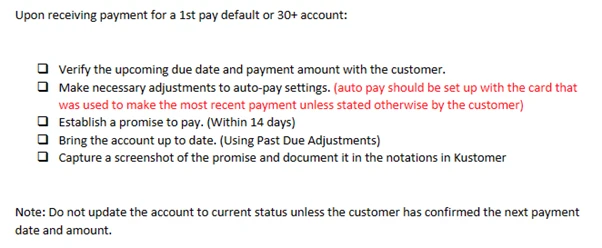

Customer Initiated Cancellations: In the event a customer contacts you directly requesting a cancellation of their lease agreement, kindly advise them to reach out to Tire Agent for further assistance. As per our policy, we are unable to process lease cancellations unless instructed by the Tire Agent.
Communication with Tire Agent: Customers should be encouraged to request an email from the Tire Agent explicitly stating the cancellation request. This email should then be forwarded to us for processing. Alternatively, the Tire Agent can copy us on the email when communicating with the customer directly.
We do not escalate cancelation request to Antonio unless we are contacted by Tire Agent.
When contacted by Tire Agent always confirm the Name of the representative you are speaking with.